How to Install Arduino IDE on Linux Without Port Issues

Installing Arduino IDE on Linux
Arduino IDE is essential for developing and uploading code to Arduino boards. This guide will walk you through installing Arduino IDE on Linux and configuring it to handle serial ports properly, including adding support for ESP32 and ESP8266 boards.
Download Arduino IDE
First, download the Arduino IDE AppImage suitable for your Linux system:
- Download Link: arduino-ide_2.3.2_Linux_64bit.AppImage
Make the AppImage Executable
After downloading, you need to make the AppImage executable:
-
Open your terminal and navigate to the directory where you downloaded the AppImage:
cd ~/Downloads -
Run the following command to make it executable:
chmod +x arduino-ide_2.3.2_Linux_64bit.AppImage
Create a Desktop Entry
To integrate Arduino IDE into your system’s application menu:
-
Create a new
.desktopfile:nano ~/.local/share/applications/arduino.desktop -
Add the following content to the file:
[Desktop Entry] Type=Application Name=Arduino IDE 2.0 Exec=/home/ommi/Downloads/arduino-ide_2.3.2_Linux_64bit.AppImage Icon=/home/ommi/Downloads/arduino-ide.png Terminal=false -
Save and close the file (in
nano, pressCtrl+o, thenEnter, thenCtrl+x).
Make sure to adjust the Exec and Icon paths according to where you have saved the AppImage and the icon file.
Configure Serial Port Access
Proper access to serial ports is crucial for communicating with Arduino boards:
-
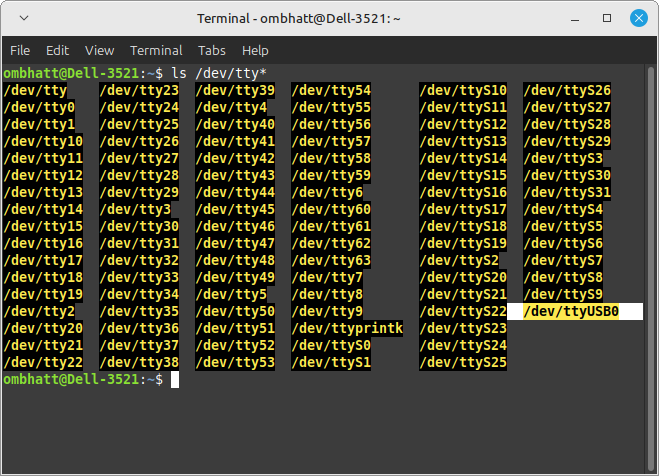
List Available Ports:
To identify the available serial ports on your system, use the following command:
ls /dev/tty*This will list all available ports on your machine. Here’s an example output:

USB Port List -
Install Required Libraries:
Install
libfuse2for AppImage compatibility:sudo apt install libfuse2 -
Add User to Dialout Group:
Adding your user to the
dialoutgroup allows access to serial ports:sudo usermod -a -G dialout $USERNote: Log out and log back in for this change to take effect.
-
Remove Brltty Package:
The
brlttypackage can interfere with serial port operations:sudo apt-get remove brltty -
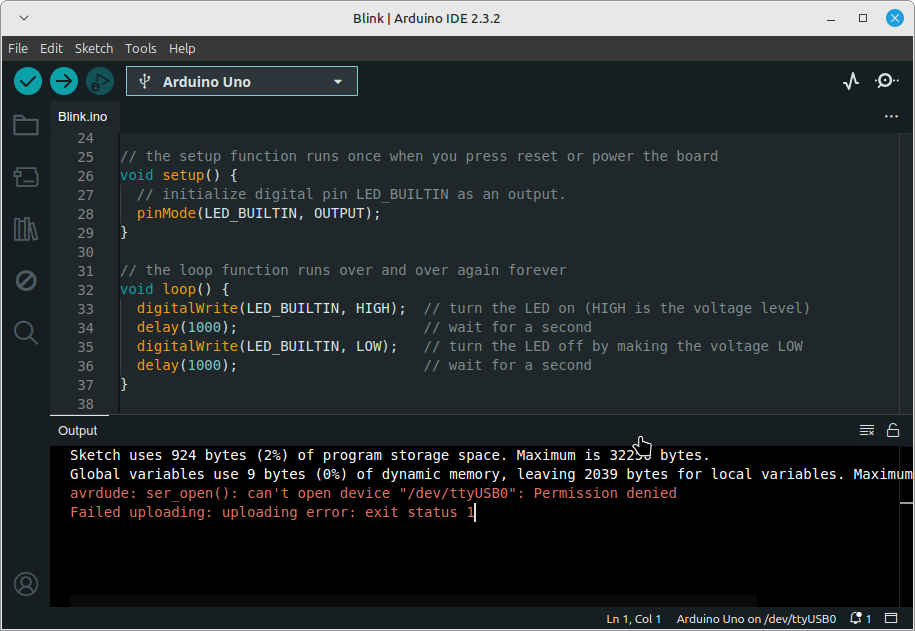
Set Permissions for USB Serial Devices:
Without proper permissions, connecting an Arduino board (like Arduino Uno) might result in a permission denied error. Here’s an example error message:
Permission Denied Error To fix this issue, adjust the permissions for the USB serial device with the following command:
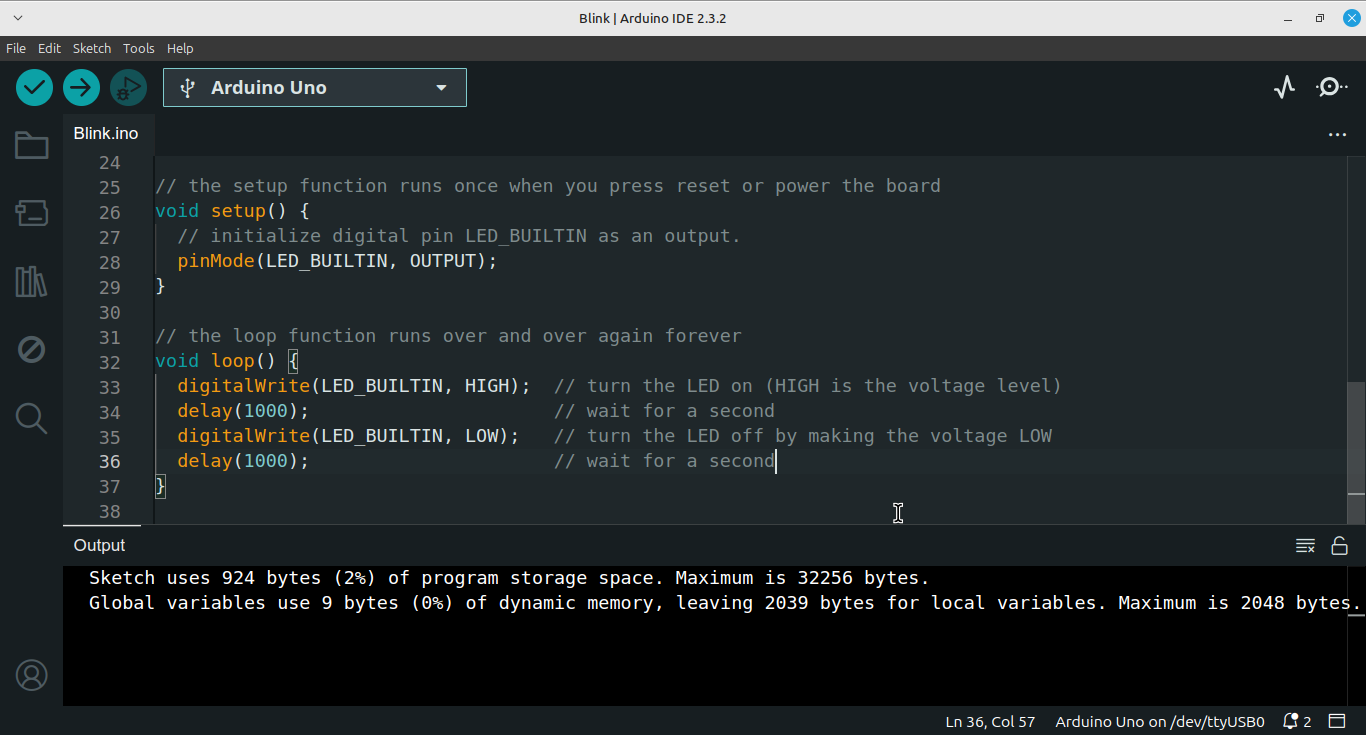
sudo chmod a+rw /dev/ttyUSB0After running this command, you should have access to the port without errors:
Access to Port Granted
Note: If you change the board or connect it to a different USB port, the device name might change to something like /dev/ttyUSB1 or /dev/ttyUSB2. In such cases, you will need to rerun the above command with the correct port name, replacing /dev/ttyUSB0 with the current port (e.g., /dev/ttyUSB1).
Add ESP32 and ESP8266 Board Support
To program ESP32 and ESP8266 boards with the Arduino IDE, you need to add the appropriate board manager URLs:
-
Open Arduino IDE and navigate to:
File > Preferences
-
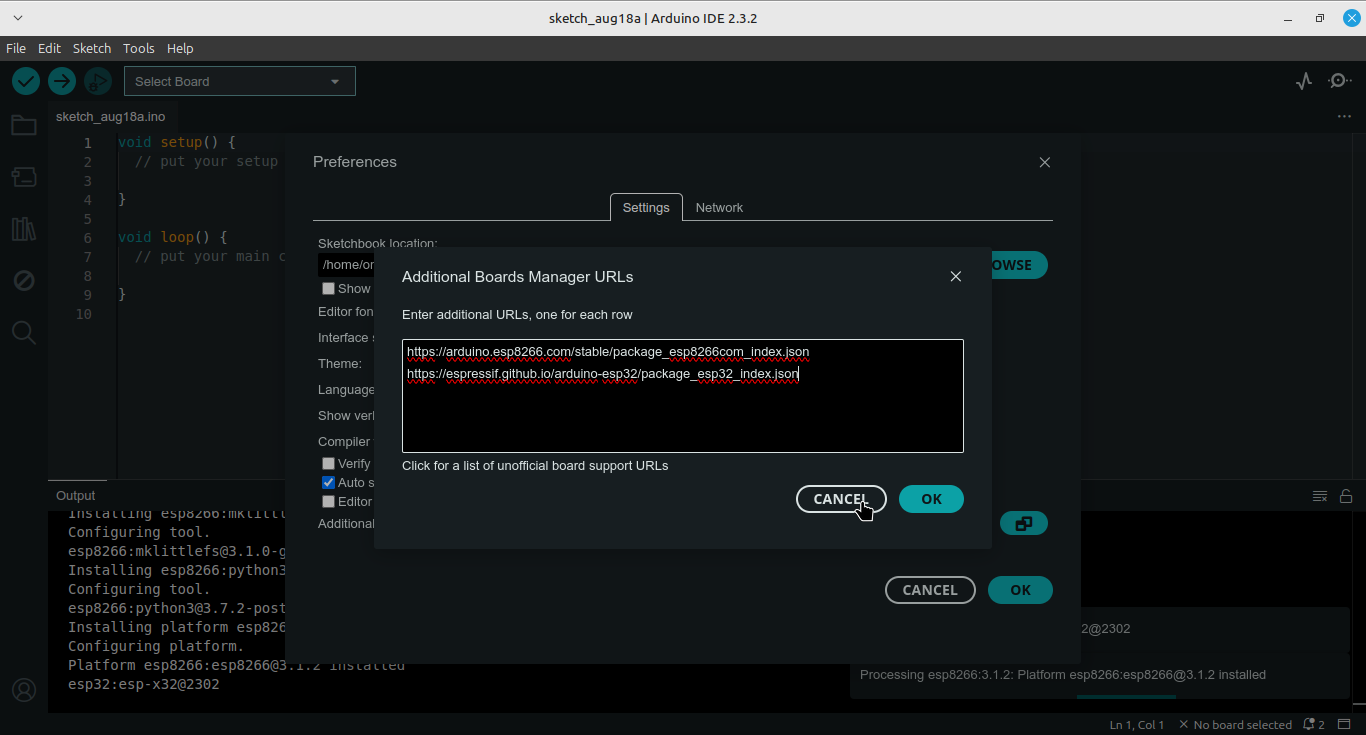
In the Settings section, find the field for Additional Boards Manager URLs.
-
Add the following URLs (separated by a comma):
https://arduino.esp8266.com/stable/package_esp8266com_index.json, https://espressif.github.io/arduino-esp32/package_esp32_index.json -
Click OK to save your preferences.
-
After adding the URLs, go to:
Tools > Board > Boards Manager
-
In the Boards Manager, search for ESP8266 and ESP32 and install the respective packages.
Here is a screenshot of the board manager in Arduino IDE:
Verify Installation
To ensure that Arduino IDE is installed correctly:
- Launch Arduino IDE from your applications menu.
- Connect your Arduino or ESP board and check if it appears in the Tools > Port menu.
- Select the appropriate board (e.g., ESP32, ESP8266) from Tools > Board.
If you encounter issues:
- Verify that the AppImage is executable.
- Confirm that you have the necessary permissions to access serial ports.
- Ensure that
brlttyis removed if it was causing conflicts.
For more help, consult the Arduino documentation.
This guide helps you set up the Arduino IDE on Linux and handle common port access issues, including adding support for ESP32 and ESP8266 boards. For additional tips and tutorials on Linux and programming, follow our blog!