How to Install Yocto Project

Yocto Project
Yocto Project is an open-source collaboration project that helps developers create custom Linux-based systems. This guide will walk you through setting up Yocto with STM32MP1 support.
Basic Dependencies
First, update your system and install the essential dependencies:
sudo apt update
sudo apt upgrade
sudo apt install -y build-essential bc chrpath cpio diffstat gawk git texinfo wget python3 python3-pip
sudo locale-gen en_US.UTF-8
Additional Dependencies
You will also need some additional dependencies for Yocto:
sudo apt install -y libssl-dev
sudo apt install -y rpcbind
sudo systemctl start rpcbind
sudo systemctl enable rpcbind
Clone Poky
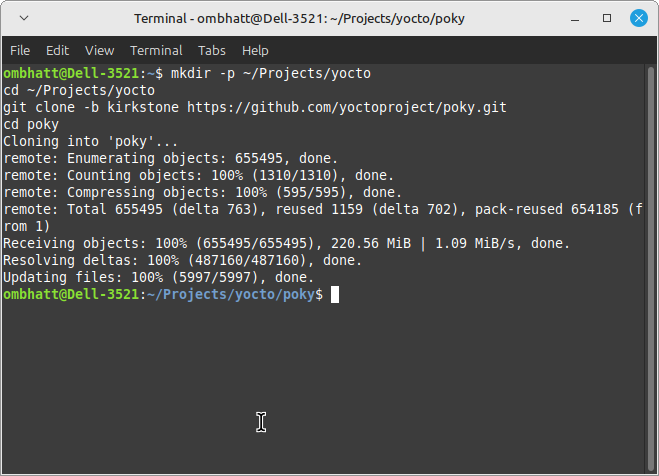
Clone the Yocto Poky build system:
mkdir -p ~/Projects/yocto
cd ~/Projects/yocto
git clone -b kirkstone https://github.com/yoctoproject/poky.git
cd poky
Clone STM32MP Layers
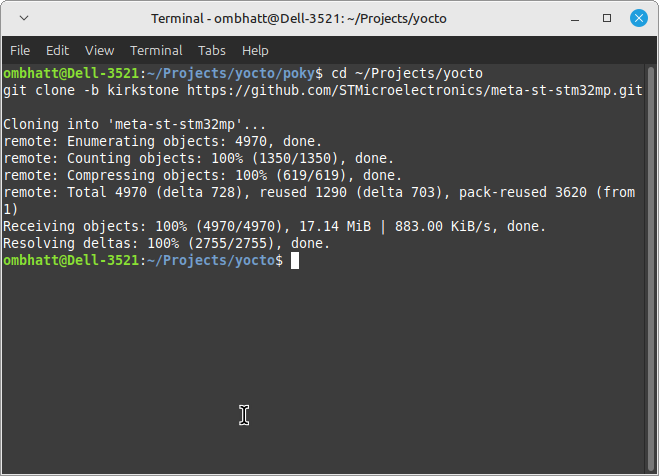
For STM32MP support, clone the meta layer:
cd ~/Projects/yocto
git clone -b kirkstone https://github.com/STMicroelectronics/meta-st-stm32mp.git
Clone meta-openembedded
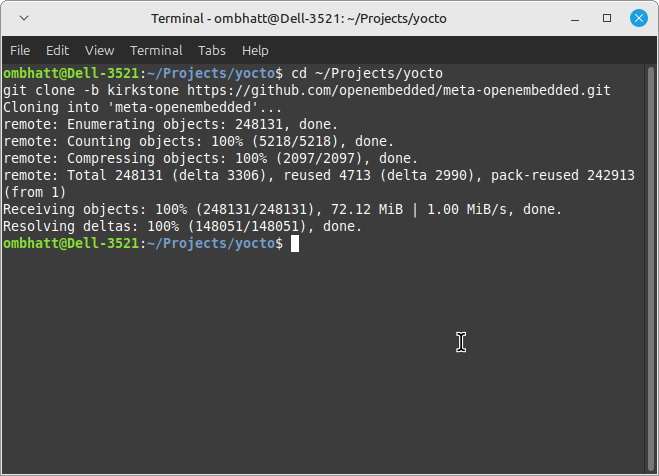
You’ll also need the meta-openembedded layer for additional package support:
cd ~/Projects/yocto
git clone -b kirkstone https://github.com/openembedded/meta-openembedded.git
Note: I am using the kirkstone branch (Yocto Project 4.0) for this setup. Branches are also known by their code names or series versions. For more details on available branches and their status, check the Yocto Project releases page
Note: Using git clone -b kirkstone [URL] directly checks out the kirkstone branch during cloning, making the process faster by avoiding the download of unnecessary data. If you’ve already cloned the repository, you can switch to the kirkstone branch afterward with git checkout kirkstone.
Configure the Build Environment
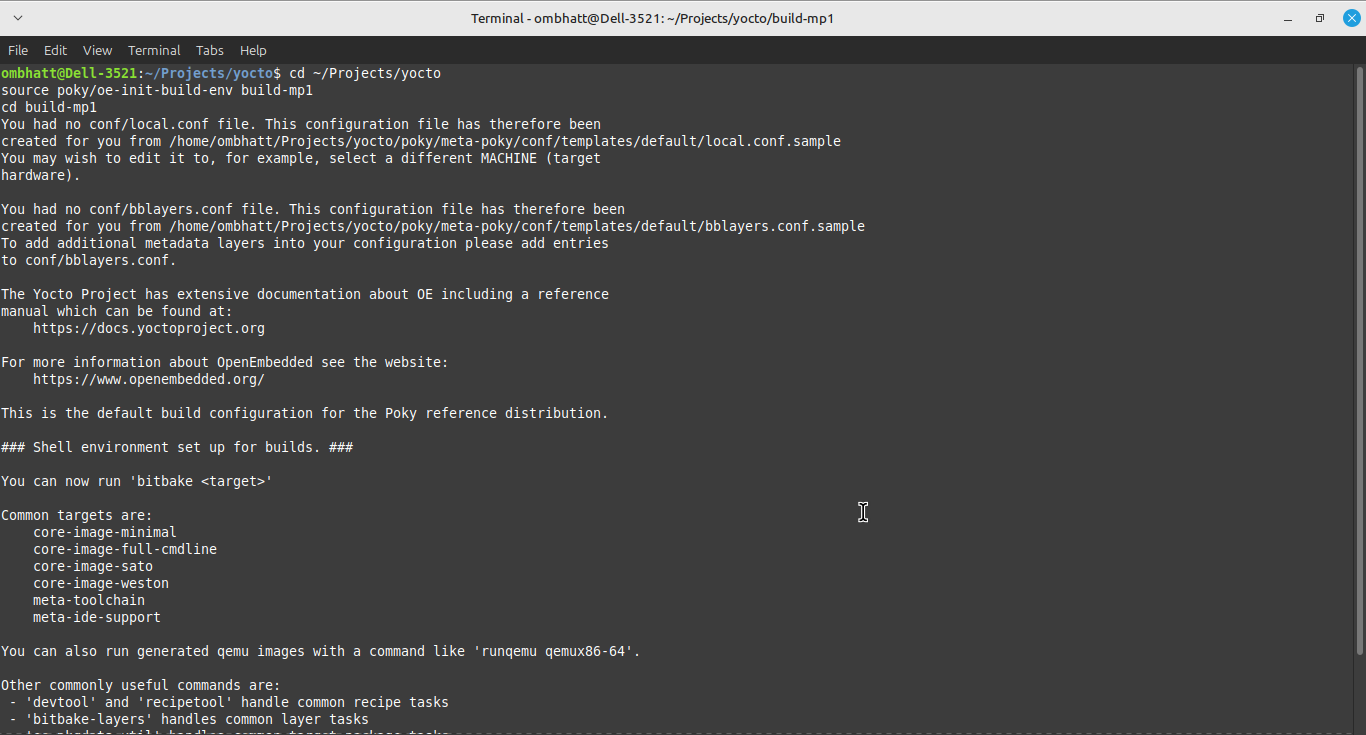
Initialize the build environment:
cd ~/Projects/yocto
source poky/oe-init-build-env build-mp1
cd build-mp1
Configure BBLayers and Local Conf
Edit the bblayers.conf file to include necessary layers:
nano conf/bblayers.conf
Add the following layers:
BBLAYERS ?= " \
  /home/user/Projects/yocto/poky/meta \
  /home/user/Projects/yocto/poky/meta-poky \
  /home/user/Projects/yocto/poky/meta-yocto-bsp \
  /home/user/Projects/yocto/meta-openembedded/meta-oe \
  /home/user/Projects/yocto/meta-openembedded/meta-python \
  /home/user/Projects/yocto/meta-st-stm32mp \
"
Save and close the file (in nano, press Ctrl+O, then Enter, then Ctrl+X).
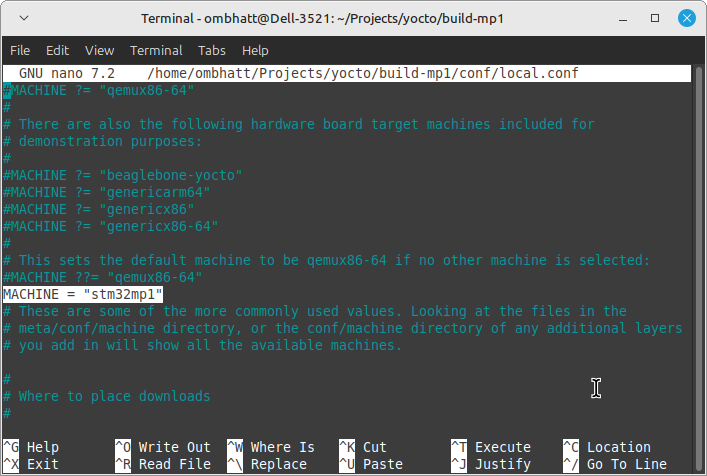
Modify the local.conf file to target the STM32MP1 machine:
nano conf/local.conf
Set the machine:
#MACHINE ??= “qemux86-64”
MACHINE = "stm32mp1"
If your system has less than 8GB of RAM, add the following to limit memory usage:
XZ_DEFAULTS = "--memlimit=1500MiB"
Alias Python Command
Yocto Project tools rely on the python command, so you might need to alias python to python3.
Follow these steps: Edit .bashrc File Open your .bashrc file with nano:
nano ~/.bashrc
Add Alias
Scroll to the bottom of the file and add the following line:
alias python=python3
Save and exit by pressing Ctrl+O, Enter, and then Ctrl+X.
Update Shell
Apply the changes to your current shell session:
source ~/.bashrc
Verify Python Version
Ensure python points to python3:
python --version
It should display something like Python 3.12.3
Install Python Packages
Before continuing, you will need to install Python packages manually:
Download the packages:
Install the packages:
tar -zxvf pyasyncore-1.0.4.tar.gz
cd pyasyncore-1.0.4
sudo python3 setup.py install
tar -zxvf pyinotify-0.9.6.tar.gz
cd pyinotify-0.9.6
sudo python3 setup.py install
Run Bitbake
You can now configure and build your project using bitbake:
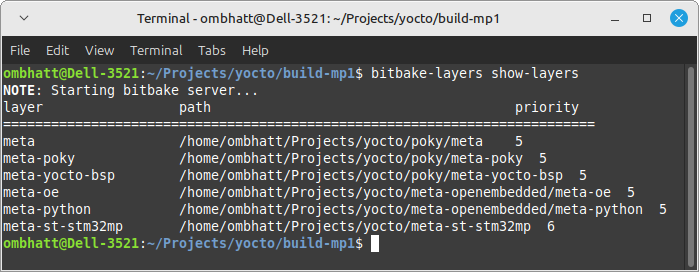
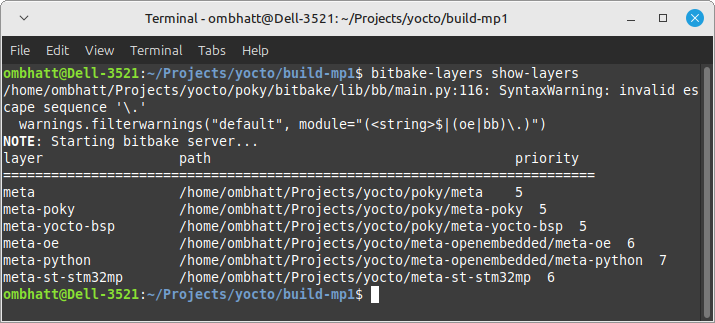
Check the layers:
bitbake-layers show-layers
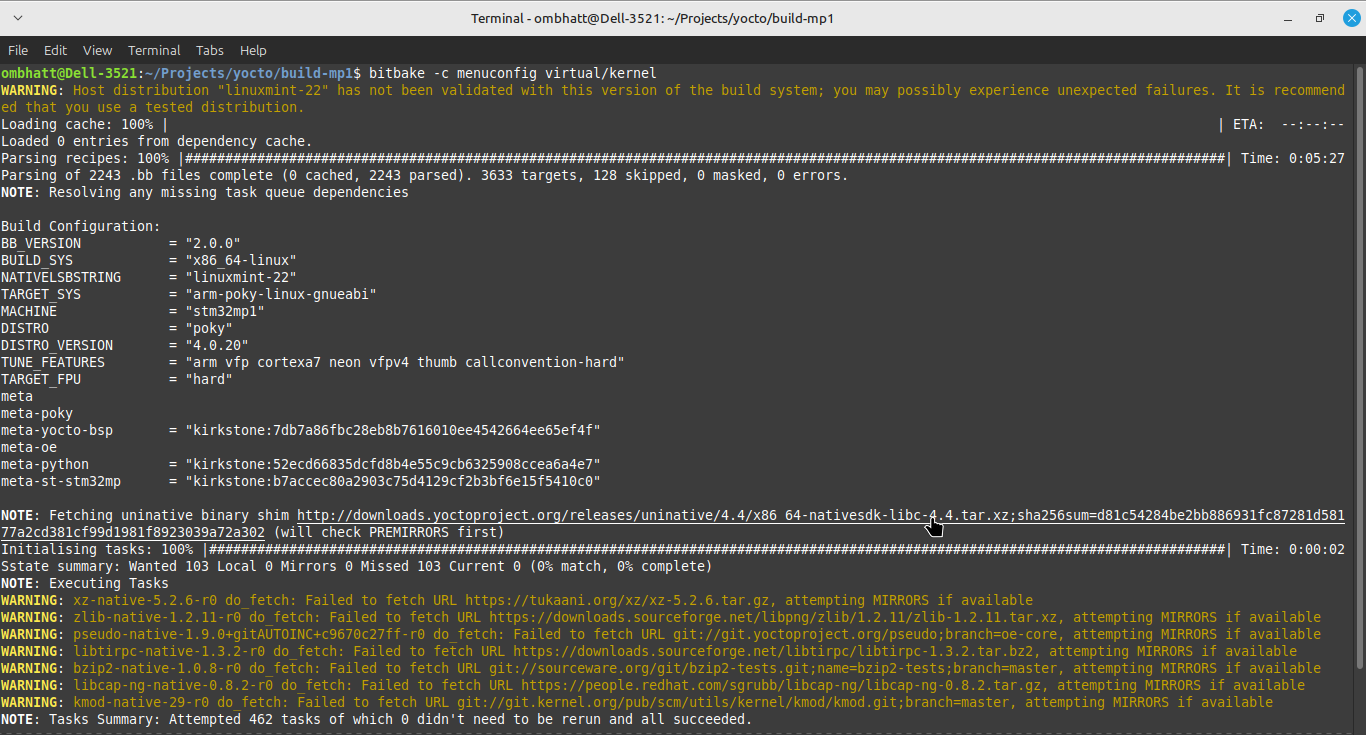
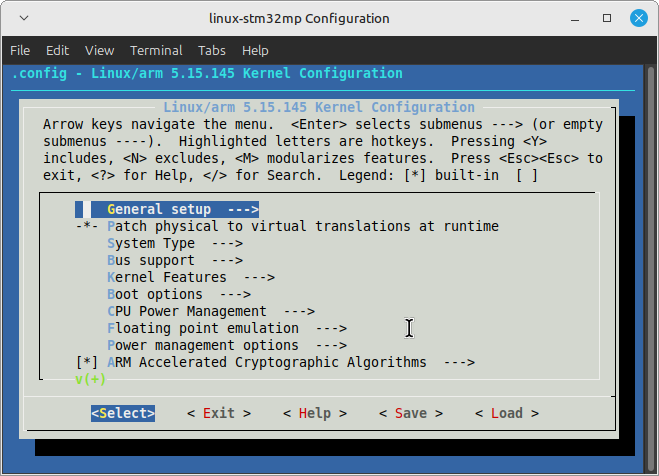
To configure the kernel:
bitbake -c menuconfig virtual/kernel
Troubleshooting Bitbake Reconnection Issues
If you encounter the error:
NOTE: Reconnecting to bitbake server…
NOTE: Previous bitbake instance shutting down?, waiting to retry… First, check if any Bitbake processes are still running by running:
ps aux | grep bitbake
If you find processes like this:
ombhatt    44968  0.6  2.5 411496 206820 ?       S    18:01   0:42 python3 /home/ombhatt/Projects/yocto/poky/bitbake/bin/bitbake -c menuconfig virtual/kernel
ombhatt    44969  0.0  0.5 105948 40592 ?        S    18:01   0:00 python3 /home/ombhatt/Projects/yocto/poky/bitbake/bin/bitbake -c menuconfig virtual/kernel
Terminate them using:
kill -9 44968
kill -9 44969
After terminating any running Bitbake processes, try running that bitbake command again
To build a minimal image:
bitbake core-image-minimal
Clean Up
If you need to clean the build:
bitbake -c cleanall core-image-minimal
rm -rf tmp
List Images
To view the available images:
ls tmp/deploy/images/stm32mp1
For more detailed steps, refer to Yocto’s official documentation & Bootlin Yocto Slides 👉 PDF .